
Briggs & Stratton 13.5 HP Engine Manual: A Comprehensive Guide
This manual details the 13.5 HP, 500cc E1350 Series Briggs & Stratton engine, covering operation, maintenance, and troubleshooting for optimal performance and longevity.
Engine Overview & Specifications
The Briggs & Stratton 13.5 HP engine, specifically the E1350 Series boasting a 500cc displacement, is a robust and widely utilized power source for various outdoor power equipment. This single-cylinder, four-stroke engine is renowned for its reliability and ease of maintenance. Key specifications include a bore and stroke designed for efficient combustion, delivering consistent power output.
It features a standard crankshaft rotation and is typically equipped with a recoil starter alongside optional electric start capabilities. The engine’s design prioritizes durability, utilizing a cast-iron cylinder liner for extended lifespan. Its compact size and relatively lightweight construction make it suitable for a broad range of applications, from lawnmowers to pressure washers, ensuring versatile performance across diverse tasks.
Model Identification & Serial Numbers
Accurate model and serial number identification is crucial for obtaining the correct parts and service information for your Briggs & Stratton 13;5 HP engine. The model number, typically found on the engine’s valve cover or blower housing, designates the engine type (e.g., E1350 Series). This number helps pinpoint specific engine configurations.
The serial number, located nearby, provides manufacturing details and the year of production. Both numbers are essential when contacting customer support or ordering replacement components. Maintaining a record of these numbers simplifies maintenance and repair processes. Refer to the engine’s exterior for a stamped or affixed label containing this vital information for proper identification.
Safety Precautions & Warnings
WARNING: This Briggs & Stratton 13.5 HP engine presents potential hazards. Always disconnect the spark plug wire before performing any maintenance to prevent accidental starting. Never operate the engine in enclosed spaces due to the risk of carbon monoxide poisoning – ensure adequate ventilation.
Fuel is highly flammable; handle it with extreme care, away from open flames or sparks. Wear appropriate eye protection during operation and maintenance. Hot engine components can cause burns; allow the engine to cool before touching. Keep children and bystanders away from the operating engine. Always refer to the complete safety section within this manual for comprehensive guidelines.
Pre-Operation Checklist
Before each use of your Briggs & Stratton 13.5 HP engine, a thorough pre-operation check is crucial. First, verify the oil level – ensure it’s within the recommended range. Next, inspect the fuel level and check for any leaks. Examine the air filter for cleanliness; a dirty filter restricts airflow. Confirm the spark plug wire is securely connected.
Check all nuts and bolts for tightness, and inspect the blade (if applicable) for damage. Finally, ensure the surrounding area is clear of obstructions. Following this checklist will contribute to safe and efficient engine operation.
Fuel & Oil Requirements

Your Briggs & Stratton 13.5 HP engine requires unleaded gasoline with a minimum octane rating of 87. Using fuel with a higher octane rating is permissible. Always use fresh fuel, and avoid fuel containing ethanol exceeding 10% as it can cause engine damage. For oil, a high-quality detergent oil classified as API service SJ or higher is recommended.
The oil viscosity should be SAE 30 for temperatures above 40°F (4°C). For colder temperatures, use SAE 10W-30. Regularly check the oil level and maintain it within the specified range to ensure optimal engine lubrication and performance.
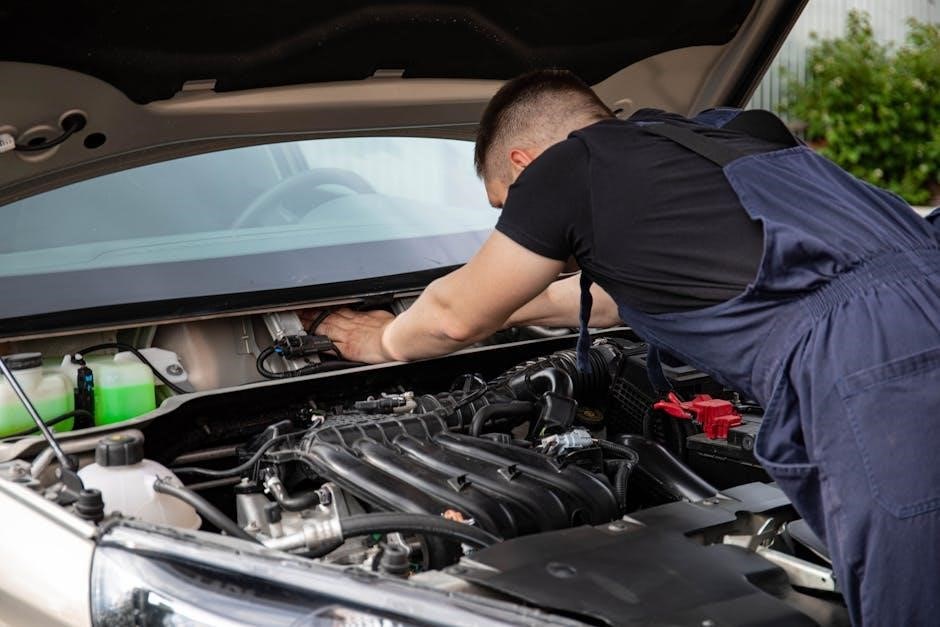
Spark Plug Inspection & Replacement
Regular spark plug inspection is crucial for maintaining optimal engine performance. Inspect the spark plug every 25 hours of operation, or annually. Look for signs of fouling, wear, or damage. A properly functioning spark plug should have a clean, dry electrode with a light tan or gray color.

To replace the spark plug, disconnect the spark plug wire and remove the old plug using a spark plug wrench. Gap the new spark plug to the manufacturer’s specification (typically 0.030 inches) before installation. Ensure the plug is tightened securely, but avoid over-tightening.
Starting Procedures
Before attempting to start the engine, ensure the fuel tank is filled with fresh gasoline and the oil level is within the recommended range. Confirm the spark plug wire is securely connected. Engage the blade control lever (if applicable) and set the throttle to the ‘Choke’ position for cold starts.
Pull the starter rope firmly and smoothly. Avoid jerking the rope, as this can damage the starter mechanism. For a warm start, the choke may not be necessary; adjust the throttle accordingly. If the engine doesn’t start after several attempts, consult the troubleshooting section.
Cold Start Procedure
When starting a cold engine, first ensure the fuel shut-off valve is open. Move the throttle to the full choke position. This enriches the fuel mixture for easier ignition in cold conditions. Firmly grasp the starter grip and pull the recoil starter rope with a smooth, deliberate motion. Avoid rapid jerking, which can damage the starter.
After a few pulls, gradually reduce the choke as the engine attempts to start. Once the engine sputters or runs briefly, fully open the choke. Continue pulling until the engine runs steadily. Allow the engine to warm up before applying a significant load.
Warm Start Procedure
For a warm engine, the starting procedure differs slightly. Begin by ensuring the throttle is set to the fast run position – do not use the choke unless the engine is difficult to start. Firmly grasp the starter grip and pull the recoil starter rope with a smooth, controlled motion. The engine should start with fewer pulls than a cold start.
If the engine fails to start after a few attempts, briefly apply the choke and try again. Avoid prolonged choking, as this can flood the engine. Once running, allow a short warm-up period before engaging any attached equipment or applying a load.
Operation Instructions
Prior to operation, confirm all safety precautions are followed and the pre-operation checklist is complete. Start the engine following the appropriate procedure (cold or warm start). Allow the engine to reach operating temperature before applying a significant load. Avoid overloading the engine, as this can lead to reduced performance and potential damage.
Pay close attention to engine sounds; unusual noises may indicate a problem. Regularly check oil levels and fuel supply during extended use. Operate the engine in a well-ventilated area. Always disengage blades or attachments before stopping the engine.
Proper Engine Load & Usage
To maximize engine life and efficiency, avoid consistently operating at maximum load. A 13.5 HP engine is designed for specific applications; exceeding these limits strains components. Ensure the cutting deck, or attached equipment, is appropriately sized for the engine’s capacity. Regularly inspect for obstructions that increase load.
Gradually increase load after startup, allowing the engine to warm up. Avoid sudden, heavy loads. Proper usage includes maintaining consistent speed and avoiding jerky movements. Overloading reduces performance and shortens engine lifespan, potentially voiding warranty coverage.
Understanding Engine Sounds
Unusual engine sounds often indicate potential problems. A consistent knocking suggests severe internal damage, requiring immediate professional attention. A rattling noise could signify loose components, like the muffler or heat shield, needing tightening. Hissing sounds may point to vacuum leaks in the fuel system.
A popping backfire often indicates incorrect carburetor adjustment or valve timing issues. Changes in the engine’s normal hum, like increased roughness, can signal a dirty air filter or spark plug problems. Ignoring these sounds can lead to more significant, costly repairs. Regular listening helps identify issues early.
Maintenance Schedule
Consistent maintenance is crucial for a long engine life. Every 25 hours of operation, inspect the spark plug and air filter, cleaning or replacing as needed. After 50 hours, change the engine oil; use the recommended grade specified in the manual.
Every 100 hours, check valve clearances and adjust if necessary. Annually, inspect all bolts and fasteners for tightness. Before storing the engine for winter, perform an oil change and stabilize the fuel. Following this schedule prevents costly repairs and ensures reliable performance. Keep detailed records of all maintenance performed.
Oil Change Procedure

Begin with a warm engine, but not hot. Remove the oil drain plug located beneath the engine and allow the old oil to drain completely into a suitable container. Replace the drain plug and tighten securely. Locate the oil fill cap and remove it.

Slowly pour in the recommended amount of new oil, checking the dipstick frequently to avoid overfilling. Replace the oil fill cap. Properly dispose of the used oil at a recycling center. Regularly changing the oil ensures optimal lubrication and extends engine life, preventing wear and tear.
Air Filter Cleaning & Replacement
Regularly inspect the air filter for dirt and debris. If the filter appears only lightly soiled, gently tap it to remove loose particles or use low-pressure compressed air, blowing from the inside out. For heavily soiled filters, replacement is recommended to maintain optimal engine performance.
Remove the air filter cover and the filter itself. Install the new filter, ensuring a proper seal. Reattach the air filter cover securely. A clean air filter prevents contaminants from entering the engine, protecting internal components and ensuring efficient combustion.
Spark Plug Maintenance
Inspect the spark plug periodically for fouling, wear, or damage. A properly functioning spark plug is crucial for reliable engine starting and efficient combustion. Remove the spark plug using the correct socket and gap tool.
Clean the spark plug electrodes with a wire brush if lightly fouled. Check the spark plug gap against the engine’s specifications – typically around 0.030 inches. Replace the spark plug if it’s heavily worn, cracked, or cannot be cleaned effectively. Ensure the new spark plug is tightened to the manufacturer’s recommended torque.
Troubleshooting Common Issues
Addressing common problems promptly ensures continued engine operation. If the engine won’t start, check fuel levels, spark plug connection, and ensure the kill switch is disengaged; A rough-running engine often indicates a dirty air filter, stale fuel, or a faulty spark plug.
Inspect the carburetor for obstructions and clean it if necessary. Low oil levels can also cause operational issues; always verify the oil level before starting. Persistent problems may require professional diagnosis and repair, avoiding further damage to the engine components.
Engine Won’t Start
A non-starting engine requires systematic diagnosis. First, confirm sufficient fuel in the tank and that the fuel shut-off valve is open. Next, inspect the spark plug – it should be clean and properly gapped. Ensure a secure connection to the spark plug wire. Check the kill switch; it must be in the ‘run’ position.
Verify the oil level; low oil can trigger a safety shut-off. If these steps fail, examine the carburetor for blockage. A flooded engine may need to be cleared by allowing fuel to evaporate before attempting restart.
Engine Runs Rough
A rough-running engine often indicates fuel or ignition issues. Begin by checking the air filter; a clogged filter restricts airflow, causing poor combustion. Inspect the spark plug for fouling or damage – replace if necessary. Ensure proper fuel delivery by examining the fuel line for kinks or obstructions.
A dirty carburetor can also cause rough running; cleaning or rebuilding may be required. Listen for unusual engine sounds, which could indicate valve problems or internal engine damage. Confirm the correct fuel mixture is being used, as incorrect ratios can lead to instability.
Carburetor Adjustment
Proper carburetor adjustment is crucial for optimal engine performance. Begin by ensuring the air filter is clean, as this impacts mixture settings. Locate the idle speed screw and the mixture control screw – typically identified by their positions. Adjust the idle speed screw to achieve a smooth, stable idle without stalling.
Next, carefully adjust the mixture control screw, turning it in small increments while observing engine response. The goal is to find the setting that delivers the smoothest acceleration and highest engine speed. Avoid leaning the mixture excessively, as this can cause overheating and damage.
Governor Adjustment
The governor maintains consistent engine speed under varying loads. Adjustment is typically needed if the engine surges or lacks power. Locate the governor arm and spring; adjustments involve altering spring tension or linkage length. Loosen the governor arm clamp before making changes.

Increasing spring tension raises the governed speed, while decreasing it lowers it. Carefully adjust, ensuring smooth operation throughout the speed range. Improper adjustment can lead to instability or damage. After adjustment, securely tighten the clamp and verify correct operation under load. Consult a qualified technician if unsure.
Engine Repair Basics
Basic engine repair often involves addressing common issues like valve problems or piston/ring wear. Valve adjustment requires checking clearances with feeler gauges, ensuring proper seating for optimal compression. Piston and ring replacement, a more complex task, necessitates cylinder inspection for scoring or damage.
Always disconnect the spark plug wire before commencing any repair. Proper torque specifications are crucial when reassembling components. Utilizing a repair manual specific to your engine model is highly recommended. If you lack experience, seeking professional assistance is advisable to prevent further damage or injury.
Valve Adjustment
Proper valve adjustment is critical for engine performance, ensuring optimal compression and efficient combustion. Begin by removing the valve cover and rotating the engine to Top Dead Center (TDC) on the compression stroke. Use a feeler gauge to measure the clearance between the valve stem and rocker arm.

Typical clearances for a Briggs & Stratton 13.5 HP engine are around 0.005″ for both intake and exhaust valves, but always consult your specific engine’s manual; Adjust using the rocker arm adjusting screw until the correct clearance is achieved. Retighten the locknut and recheck the clearance.
Piston & Ring Replacement (Overview)
Piston and ring replacement is a more complex repair, typically undertaken when significant engine wear is detected, like low compression. Begin by removing the cylinder head and carefully extracting the piston from the connecting rod. Inspect the cylinder bore for scoring or damage; honing may be required.
New piston rings must be properly gapped before installation using a ring expander. Lubricate the piston and rings with engine oil before carefully inserting them into the cylinder. Ensure correct piston orientation and torque the connecting rod bolt to the manufacturer’s specification. Reassembly follows reverse of disassembly.
Winterization & Storage
Proper winterization prevents corrosion and ensures easy starting next season. First, drain all fuel from the carburetor and fuel tank to avoid gumming. Add fuel stabilizer to any remaining fuel in the tank if complete draining isn’t possible. Remove the spark plug and pour a tablespoon of engine oil into the cylinder, then slowly pull the starter rope to distribute it.
Change the oil and filter. Clean the exterior of the engine. Store the engine in a clean, dry location, covered to protect it from dust and moisture. Disconnect the battery if applicable, and store it separately.
Parts Diagrams & Ordering Information
Detailed parts diagrams are essential for identifying the correct replacement components for your Briggs & Stratton 13.5 HP engine. These diagrams, often available online through the Briggs & Stratton website or authorized dealers, illustrate exploded views of the engine’s assemblies.
To order parts, you’ll need the engine model number and serial number. These numbers are typically located on the engine’s valve cover or blower housing. Parts can be ordered directly from Briggs & Stratton, through their authorized dealer network, or from various online parts retailers. Ensure compatibility before purchasing!